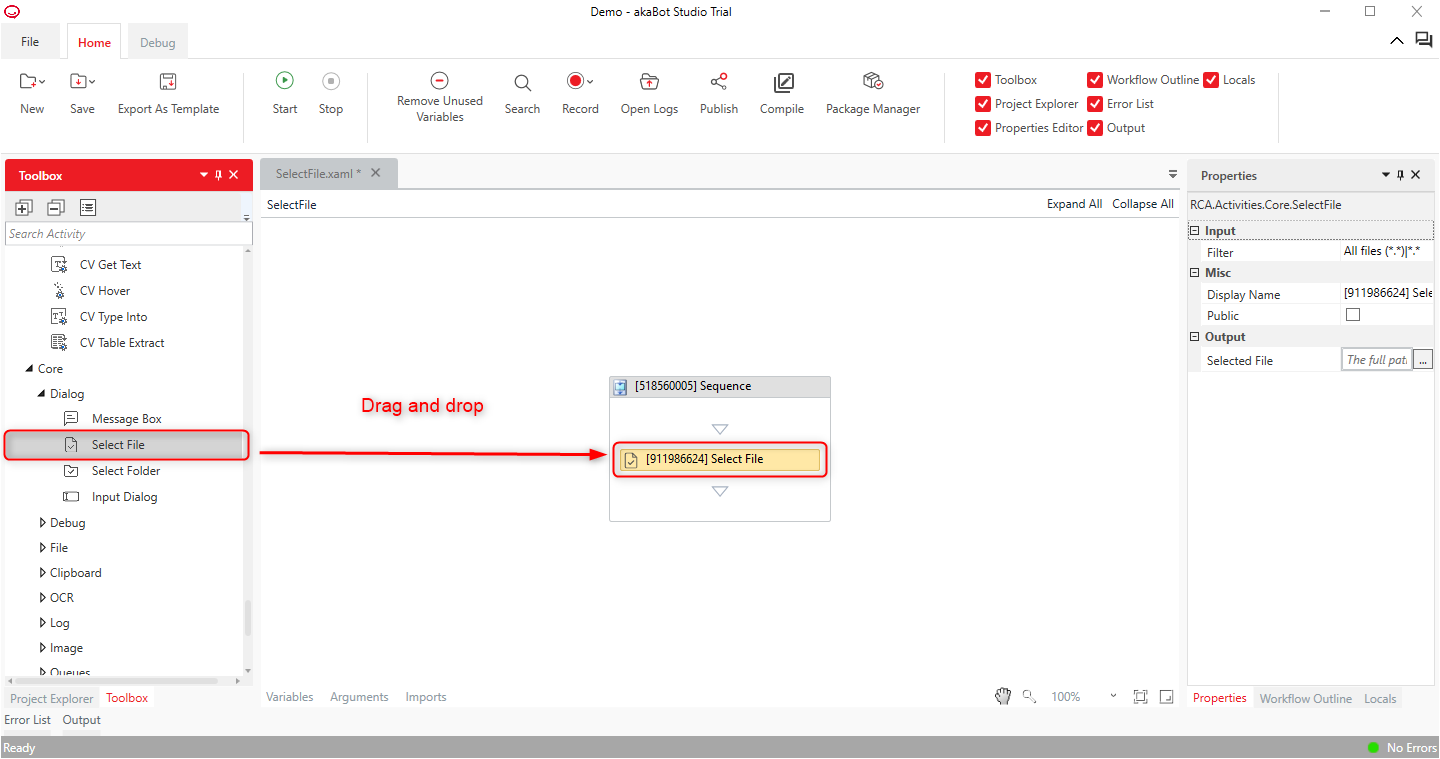
This activity displays a File Selection Dialog Box and retrieves the file path selected by the user.
TABLE OF CONTENTS
1. Activity program name
RCA.Activities.Core.SelectFile
2. Description
4. How to use

This setting defines the files displayed in the dialog box. Since we want to display all files, use the default filter "All Files (*.*)|*.*" in the Properties Panel under Input > Filter.
For more details on the filter property, refer to "About Filters".

Specify a variable to store the selected file path. In the Properties Panel, under Output > Selected File, assign a String variable (in this case, "filePath").
If the variable hasn't been created yet, create a String variable and assign it. You can create a variable by using "Create from Property", which will create the variable as a String type.
For more details on creating variables, refer to "Creating Variables".

To display the selected file path, drag and drop the "Message Box" activity from Toolbox > Core into the Designer panel.
In the Message Box activity, set the Text property to "filePath" to display the selected file path.


About Filters
By setting a filter, you can filter the dialog box by file type.

The syntax is [File Description]|[File Type (Extension)]. Let's see how the default filter "All Files (.)|." is reflected in the dialog box.
All Files (.)|.
It will be displayed in the "File Type" section of the dialog box.

All Files (.)|.
Files in the dialog box will be filtered and displayed. "*.*" means "All Files."

Here is an example of a filter. It includes the filter and the corresponding dialog box display.
Note: The folder used in the "All Files" example is filtered and displayed in the dialog box.
Filtering Excel Files
Set the file type to "*.xlsx" and specify a description indicating Excel files.
Excel Workbook (.xlsx)|.xlsx
Filtering Multiple File Types
Specify multiple file types by separating them with a semicolon (;).
Image Files (.png, .jpg, .bmp, .gif)|.png;.jpg;.bmp;.gif
To Display Multiple File Types in the File Type Dropdown List Box
Use a pipeline (|) to separate multiple file type entries. For example, if you want to include "PDF Files" and "All Files" as options:
Adobe PDF Files (.pdf)|.pdf|All Files (.)|.
- Screenshot of the dialog box display when opened:
(Add the corresponding screenshot or illustration showing the dropdown options).
Was this article helpful?
That’s Great!
Thank you for your feedback
Sorry! We couldn't be helpful
Thank you for your feedback
Feedback sent
We appreciate your effort and will try to fix the article


